Good advice on how to remove a scratch on an acrylic bathtub at home
 Acrylic bathtubs are popular with residents of Russia and beyond. They are lightweight, durable and inexpensive.
However, even with the most careful handling, scratches and chips can form on them, since acrylic has a low resistance to mechanical and chemical stress.
Such damage spoils the appearance of the bath, leading to corrosion and deformation. For information on how to remove a scratch on an acrylic bathtub and not ruin it, read the article.
Content
How to remove minor damage?
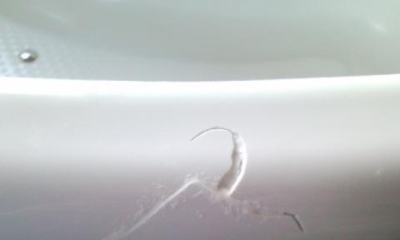
Before proceeding with the removal of minor scratches on the bathroom, it must be thoroughly washed and dried. It should be noted that acrylic is a porous material, therefore it takes at least 7 hours to fully dry it. It is not enough to simply wipe the surface with a dry cloth. It is necessary to give the moisture time for full evaporation.
Instructions for removing minor scratches:
-
 The first stage of processing is grouting the surface with fine-grained sandpaper. The skin should be the finest, and the grain size should be P2500 units.
Only if these conditions are met will it be possible to wipe, and not scratch the surface.
- If, after grouting, the surface is smooth and no roughness is felt on it, then the work was done with high quality.
- The second stage is the treatment of the damaged area with an abrasive polish. On sale you can find special repair kits, the average price of which is 600 rubles. The polish is applied to the surface of the bathtub and rubbed with a felt cloth.
- After 2-3 hours, the polish is absorbed, after which you can proceed to the third stage of processing. It boils down to applying wax for acrylic baths (this component is also included in the repair kit).
- After an hour, the bath is washed using a liquid product.
Video tips will help remove scratches on an acrylic bath:
How to repair chips?
If a chip has formed on the surface of the bath, then it will not be possible to wipe it with a sandpaper, more serious repair work will be required.
For this you need to purchase a repair kit, which includes:
- sandpaper;
- polishes;
- reducing agent (putty);
- napkins;
- gloves and applicator.
The instructions for removing chips involve going through the following steps:
 First you need to wash and dry the damaged area, then degrease it with white spirit or acetone.
- Around the perimeter, the chip is pasted over with masking tape. This is to prevent the polish from getting on the intact area.
- Using 1200 grit sandpaper, rub the surface of the bath. Such processing will allow the putty to grip more tightly.
- The dust formed after sanding is removed with a vacuum cleaner. After processing, use the alcohol wipe included in the kit.
- The putty is prepared according to the instructions for use, which is attached to the purchased set. Sometimes it is included in the kit ready-made.
- Using a spatula, the mixture is applied to the chip so that it is completely filled.
- After 30 minutes after the performed manipulations, it is necessary to remove the masking tape.
- After 24 hours, the treated surface is sanded with sandpaper and polished with felt.
How to cover cracks?
Getting rid of the crack is much more difficult.than from a scratch, even the deepest one. This defect is through, so it can lead to water leakage in the bathroom and flooding of neighbors.
Another danger of a crack is its ability to grow in size. It creeps away under the influence of weight, when using detergents and even when water gets in.
The repair is carried out as follows:
- The defective surface is sanded.
- With the help of a drill, 2 holes are drilled: on one and on the other side of the crack. Its end should be in the center of the hole. This will create even pressure around the edges of the crack. It is necessary to control the pressure on the drill. The holes should not be allowed to be deeper than the crack itself.
- Then you need to open the crack and degrease it.
- The final stage of the work is the application of the repair compound, its drying and subsequent grinding.
It is necessary to start removing cracks immediately after their detection. Otherwise, they will creep and repair will be impossible.
How to fix holes?
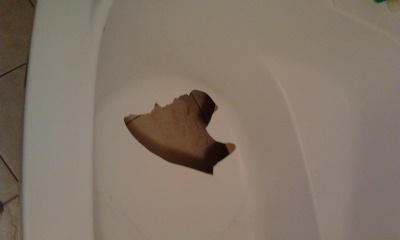
A hole can be caused by a heavy object falling onto the acrylic bathtub. If it has sharp edges, then the likelihood of a through hole is increased. Only small holes are subject to liquidation.
Repair instructions:
 the bath must be cleaned, dried and degreased from two sides: from the inside and from the outside;
- glass cloth is attached to the back with epoxy glue - it should be 5-6 cm larger than the hole in diameter;
- the second fiberglass patch is attached 2 hours after fixing the first one - it should be 5 cm larger in size;
- the third segment exceeds the second by another 5 cm, it is also glued after 2 hours;
- after 1.5 hours, the inside of the bathroom is degreased and sanded;
- the damaged area is putty and leveled;
- when the putty dries, it is sanded again.
If the hole exceeds 5 cm in diameter, then it will not be possible to repair it. The bathtub will have to be replaced.
Preventive measures
Preventive measures to prevent scratches and chips on an acrylic bath:
- Do not use acid and alkali products for bathroom care.
- Do not use abrasive cleaners. Preference should be given to gels.
- Do not pour very hot water into the bathtub. Manufacturers do not recommend exceeding 60 degrees.
- After each use of the bath, rinse it with soapy water and wipe it dry.
- For prophylactic purposes, a polishing gel should be applied to the surface 2 times a month. It will not only give it strength, but also refresh its shine.
- The bath surface should be free of rust and limescale. When they appear, you need to clean with safe compounds, for example, hydrogen peroxide.
- When carrying out repairs, the bath must be taken out. If this is not possible, then it must be covered with foam and covered with polyethylene. This will prevent scratches and chips from accidentally dropping a tool or building material.
Compliance with these simple recommendations will extend the life of the bathroom.
What cannot be used for restoration?
 To remove scratches in the bathroom do not use sandpaper with a grain mark below P2500.
Even the P2000 is no longer suitable for repair work. This paper will not sand but scratch the surface.
Not suitable for removing scratches with pumice and metal brushes. Do not use abrasive powders... They won't help solve the problem.
It will not be possible to correct the defect with ordinary putty. We need a professional acrylic-based composition.
Helpful information
Tips for removing scratches:
- If the scratch has just appeared, it can be treated with a waterproof camouflage pencil. They are sold in online stores and cost about 170 rubles.
- You need to start removing any defects immediately after they are found. This will avoid their increase in size and complex repair work.
- If there are a lot of scratches, it will be problematic to restore the bath. It is much easier to call the masters involved in the restoration of baths with liquid acrylic. You can find many similar ads on the Internet. The average cost of such services is 2500 rubles.
All the most important and useful information about bathroom cleaning is collected in this section of the site.
Conclusion
You can independently remove not only small scratches, but also deep damage on the acrylic bath. If desired and the necessary tool is available, it will be possible to cope even with chips, cracks and holes. The main thing is to clearly follow the instructions, to act slowly and carefully.


