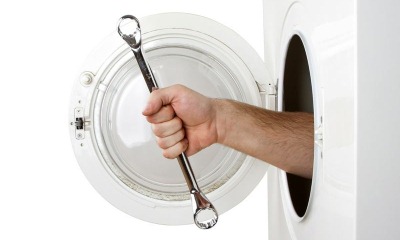
Tips from the masters on how to remove a drum from a Samsung washing machine
 The manufacturer of the Samsung washing machine pays special attention to the quality, reliability and functionality of such an element of the washing machine as the drum.
But violations of the operation of a household appliance, as well as hard tap water, lead to the fact that even such a durable element fails.
A professional master can quickly replace a drum, but a detailed study of the issue of how to remove a drum from a Samsung washing machine with your own hands will save a significant amount of money.
Content
What tools do you need?
So that the work on dismantling the washing machine drum goes quickly, it is worth taking care of the following tools in advance:
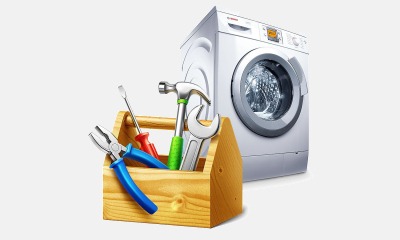 screwdrivers: Phillips and slotted (a screwdriver with nozzles will significantly speed up the work);
- keys set;
- pliers;
- hammer, chisel;
- marker;
- lubricant cleaner and sealant.
Also, in the work you can not do without rags, a large basin and rubber gloves for hands.
How to prepare the machine for parsing?
Proper preparation of the washing machine before dismantling will significantly speed up the process of removing the drum.
In order to make it more convenient to work, the washing machine is moved away from the wall by at least two meters.
How to get to the detail?
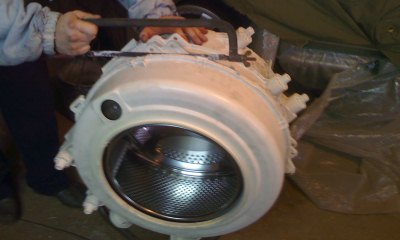
Disassemble the Samsung washing machine in order to remove the drum, it will be much easier if you adhere to a clear sequence of actions:
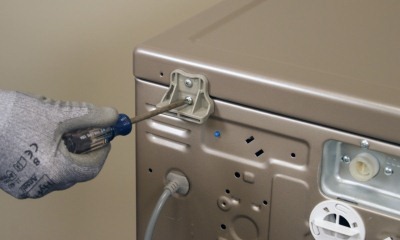
- Using a Phillips screwdriver, remove the bolts holding the top panel. After the bolts are unscrewed, the lid is pushed towards itself and slightly lifting it upwards, removed from the washer.
- Remove the dashboard. To do this, loosen all the locks located under the tray for the detergent powder, also around the perimeter of the control unit. It is not necessary to disconnect the control unit wiring. The board is neatly laid out on top of the washer or hung on a special side hook.
- Dismantle the washing machine hatch doors (located in the lower right corner of the case). To dismantle, you need to pick up the panel with a screwdriver.After the door has been removed, residual water will start pouring out of the open hole. To maintain cleanliness around them, rags are lined on the floor or some container is placed under the technical hole.
-
 Remove the front panel. To do this, using a screwdriver, loosen the metal or plastic clamp on the hatch cuff.
After that, the seal is carefully bent into the drum. Self-tapping screws along the perimeter of the panel are unscrewed and separate the front panel from the case by 3 cm.
Through the opened backlash, the wiring is disconnected from the UBL (it is possible to completely dismantle the blocker).
- The next stage is to disconnect all conductors leading to the drum from the heating element, electric motor, pump, sensors. It is very important to act carefully and slowly so as not to damage the elements. The inlet valve, pressure switch, and branch pipe (connects the tank and powder receiver) are also dismantled.
- Take out the counterweights. These are two concrete blocks located under the top cover of the washer. In order to dismantle the counterweights, it is necessary to unscrew the fixing bolts. You need to work very carefully, as concrete blocks are very heavy.
- Dismantle the shock absorbers. First of all, remove the lower shock absorbers (they are also dampers). These elements fix the tank. Next are the springs that secure the tank from above.
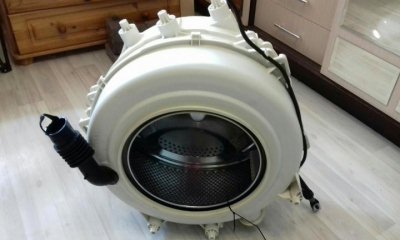
After the tank is removed from the washing machine, it is laid out on a flat surface with the pulley up. It is necessary to be prepared for the fact that the tank is very heavy and in order to remove it you will need help.
How to get it out?
Before opening the tank and removing the drum from it, it is necessary to carefully study the material from which the tank is made and the principle of its connection.
Most often, the manufacturer Samsung completes washing machines with plastic, collapsible tanks.
After the tank is opened, it is necessary to act according to the following algorithm:
- unhook the lower half of the tank (there is a crosspiece and a pulley on it);
- remove the pulley from the tank (unscrewed with a wrench);
- insert a bolt into the vacant place and carefully, using a hammer, knock it out in the opposite direction.
In a situation where it is impossible to knock out the shaft, grease will come to the rescue... It is enough to carefully process the joint and wait twenty minutes. Work will go much faster afterwards.
Step-by-step instructions for replacing
 The removed drum is carefully inspected for defects.
If a decision is made to completely replace it, then it should be understood that the drum is sold complete with a tank. You cannot purchase a drum separately.
Replacing the drum quickly with your own hands is possible, provided compliance with a certain sequence of actions:
- A pulley is connected to the tank and fixed with a bolt.
- The tank together with the drum is raised and installed through the top to its original place in the body. The tank is hung on hooks.
This process must be paired with an assistant.
Reassembly and Inspection
After the new drum is installed, you can start the reassembly process.
Algorithm of actions:
- a drive belt is put on the pulley;
- connect heating elements to the wiring;
- connect drain hoses;
- mount UBL connectors (hatch blocking device);
- mount the front panel of the washing machine in its original place;
- install the hatch cuff;
- fix the counterweights in place;
- install and fix the top cover of the washing machine.
Also, it will not be superfluous to check with the diagrams that are indicated in the user manual.
After the washing machine is assembled, it is necessary to check the quality of the work done... For this, the household appliance is connected to the water supply and sewerage network.
Start any washing program, during which, when the drum is correctly installed, there are no extraneous sounds and vibration of the washing machine body.
Possible difficulties during knot removal
 In the process of dismantling the washing machine, an unpleasant fact may emerge - the drum is enclosed in a non-separable tank.
In this situation, in order to remove the desired element (drum), the tank must be cut.
After repairing or installing a new drum, many holes are drilled along the seam for reassembly. Before assembling the disassembled tank, the sawing points are carefully coated with sealant.
All the most useful and interesting about the drum of the Samsung washing machine can be found in this section.
Conclusion
Replacing the drum in a Samsung washing machine is a laborious process. You can do it yourself only on condition of a preliminary, detailed study of the issue, otherwise it is better to entrust the repair to professionals.


